Have you ever wondered why the customer purchasing on your site did not complete the purchase, why they abandoned the cart, and at what stage they dropped off?
Well, it's important to know to improve your business. You need insights into how your customers behave on your website to do this. This process is called checkout tracking.
In this guide, we'll show you the easiest way to set-up checkout tracking.
Let's dive in!
Why is tracking checkouts important?
The checkout process is the series of steps that a user takes to purchase products or items on your website. It includes every step a consumer takes to get to the checkout page, from adding a product to the cart to confirming the purchase.
By tracking checkouts, you can see whether the user finished the entire process and, if not, at what stage they abandoned it. This helps in understanding customer patterns and behavior and the reasons or issues in the user journey that can be causing drop-offs.
You can develop strategies and make data-driven decisions to boost sales by analyzing the data.
Checkout analytics tracking with Simple Analytics
We use Simple Analytics instead of Google Analytics since it's 10x easier to set-up checkout tracking.
Install the Script
If you aren’t a Simple Analytics user already, this is a mandatory step, while others can jump to step 2.
Start by creating your account on Simple Analytics, which will prompt you to add your website and the code below onto your website’s <body> tag.
<script async defer src\="<https://scripts.simpleanalyticscdn.com/latest.js>"\></script> <noscript><img src\="<https://queue.simpleanalyticscdn.com/noscript.gif>" alt\="" referrerpolicy\="no-referrer-when-downgrade" /></noscript>
If necessary, you can place it in the <head> section, but remember to omit the <noscript> part.
Also, if you choose to use our custom domain feature, replace scripts.simpleanalyticscdn.com and queue.simpleanalyticscdn.com with your custom domain.
Create the Events and track Checkout analytics
Once the script is installed, it’s time to add our events so Simple Analytics can track and display it on the user dashboard.
Below is the sample code that needs to be added to your website.
// Event to track checkout event

sa_event("checkout_success");
Test & Access Event Data
Now that you have started collecting the events data head over to the Simple Analytics dashboard.
Then click on the events tab, and you should be able to see all your events there including the ones you added.
Note: Events only get added once they are triggered. If you have just added them, you can manually trigger them once for testing by going through your checkout flow.
Create Goals
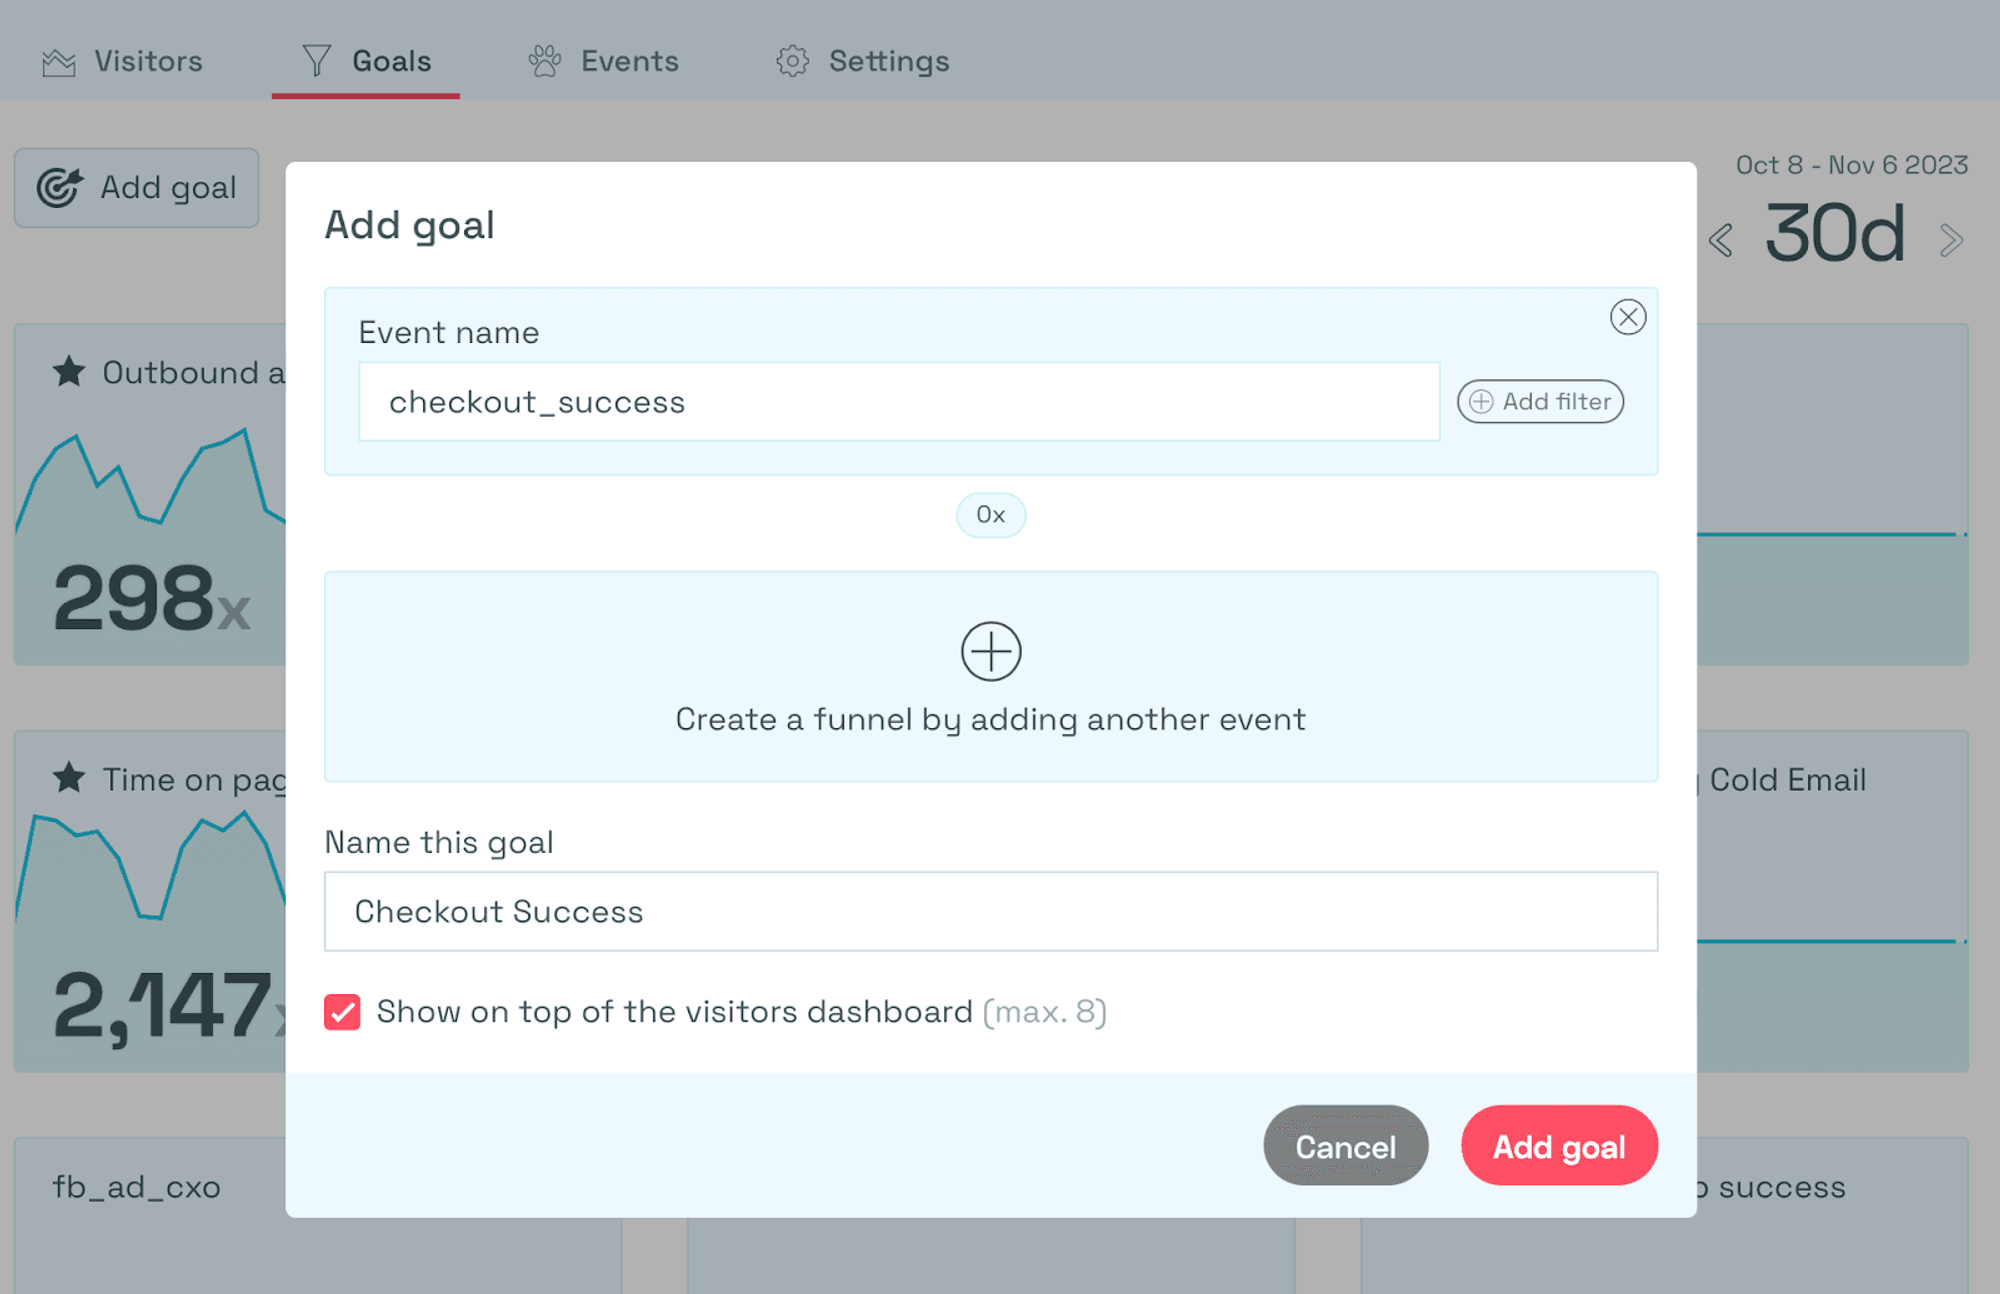
Next is the final and most important step: Start visualizing your metrics using our “goals” feature.
To effectively measure checkouts, create the goals based on the event triggered:
- Define the goal: Give it a name like “Checkout Success”
- Set the event: Choose the event “checkout_success”
- Mark the goal as important: Ensure it appears in the visitor dashboard for easy tracking.

By creating the goal, you can monitor the number of checkouts.
Final Thoughts
Tracking checkouts on your website is crucial for understanding customer behavior, identifying drop-off points, and improving the user journey.
By analyzing checkout data, you can make data-driven decisions to boost sales and reduce abandonment.
Simple Analytics is a privacy-friendly and simple analytics tool that gives you the insights you need, while being 10x easier to handle than GA4. Want to see what that looks like? Check our public dashboard here.
